|
Bevel Jig
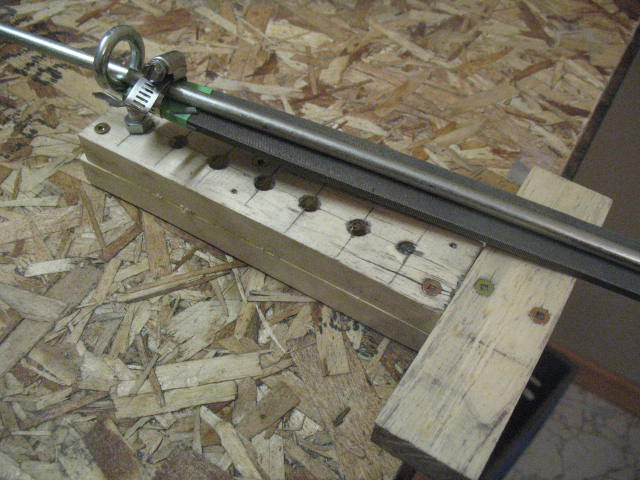
Here is my homemade Bevel Jig. It is to help me keep a consistent angle while allowing me to keep constant and steady pressure to grind my bevels by hand.
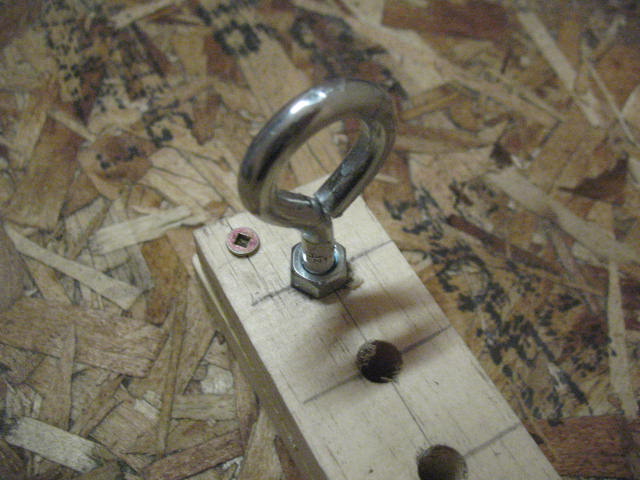
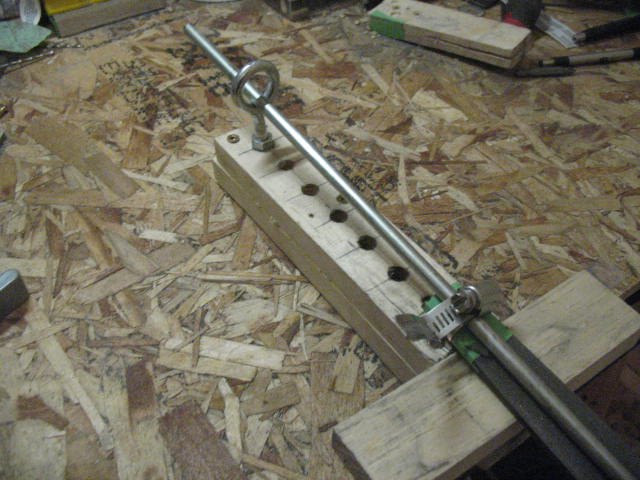
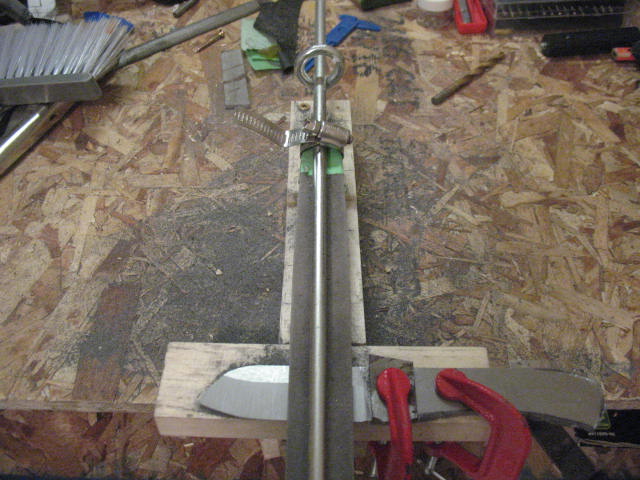
As you can see, I have a 1x2 base with a T shape on top. I have drilled several holes for the eye bolt to fit through. The eye bolt has a nut on the top and bottom so I can adjust the angle as needed and then lock it in. The round stock is clamped to my Nicholson file and it slides back and forth while keeping a consistent angle. The round stock is twice the length of my file (12" file = 24" round stock). I should have made the length of the wooden base the same length as the file so as to use the full length of the file. As I made is 2 inches shorter, I don't use the entire length of the file, though I don't have to worry about the round stock falling out of the eye bolt either. As you can see in the photos, the knife clamps to the T, and off I go with the file. The base is glued together and then screwed and bolted to the work table. this is a good height for me, and I can comfortably work there for the necessary time to sweat out a bevel. I cannot take any credit for the design, as I have looked at countless variations of Bevel Jigs made by other people with more experience and better abilities at communicating the execution. I have modified the design to work for me, and it works great. If I was doing it over again, I would use 1x3 instead, as it is sturdier. I would also make the base the length of the file as I mentioned above. Another change would be the holes I drilled all the way up do not seem to be necessary, and I have a long eye bolt and can adjust the angle from 2 or 3 of the farthest holes and it would be sufficient. If you have any questions, please don't hesitate to contact me, I would be happy to help answer what I have failed to answer in the paragraphs above. -M 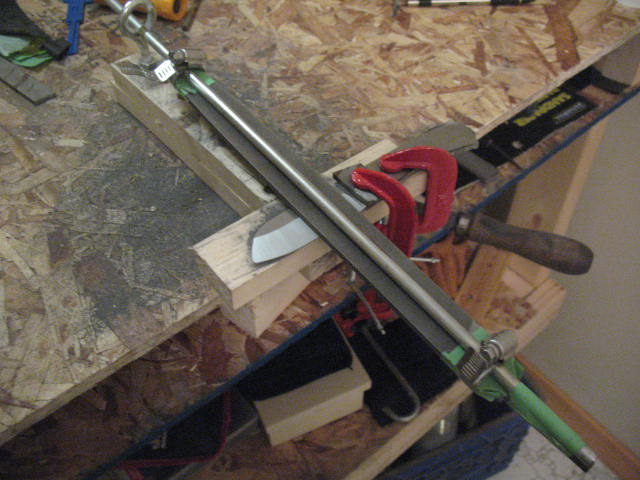
|
